我们在购买VPS的过程中,经常看到商家有提供LookingGlass(简称LG)地址,可以直接在页面查看测试IP,数据中心位置,下载文件等等,这个是如何安装的呢?今天我们一起看看他的手动安装过程。不过写在前面的是,该工具对于VPS用户来说并无意义,主要是商家用来提供测试页面,对于用户来说,探针党可以装装B而已……
我采用的是手动安装的方式,所以我已经在VPS上安装了环境,具体安装什么环境这个并无限定。
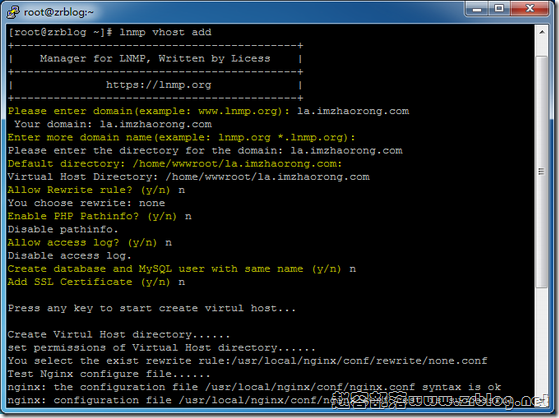
首先,我们添加虚拟主机,以LNMP为例,添加域名等(可先将域名解析至安装该页面的IP地址),这个很简单,军哥LNMP网站均有说明。
完成之后,我们进入域名文件夹,下载源码和执行安装,这里域名我以la.imzhaorong.com为例。
cd /home/wwwroot/la.imzhaorong.com  #进入目录

wget http://dl.zrblog.net/php/LookingGlass_php5.zip   #php5

wget http://dl.zrblog.net/php/LookingGlass_php7.zip   #php7

unzip LookingGlass_php5.zip   #解压(我的是PHP5)

cd LookingGlass && bash configure.sh   #进入目录和开始配置
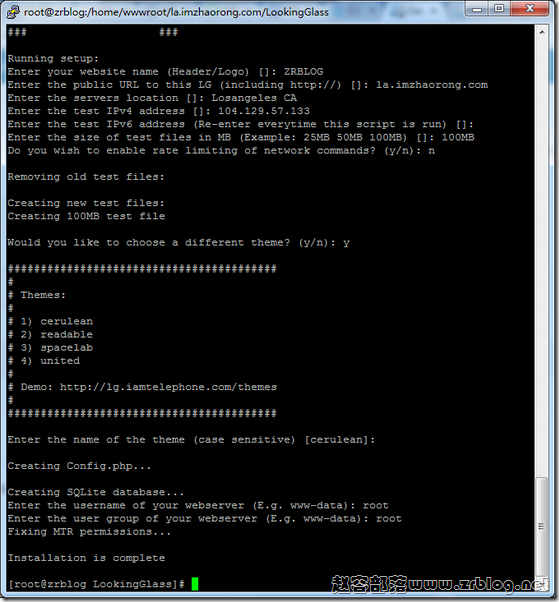
开始配置后,我们就可以看到如下图的信息。
Enter your website name (Header/Logo) []:ZRBLOG(类似于网页头部信息)

Enter the public URL to this LG (including http://) []:la.imzhaorong.com(域名)

Enter the servers location []:Losangeles CA(数据中心位置)

Enter the test IPv4 address []:1.1.1.1(服务器IP地址)

Enter the test IPv6 address (Re-enter everytime this script is run) [](IPv6,有就写没有就回车)

Enter the size of test files in MB (Example: 50MB 100MB) []: (下载文件大小,可以写几个)

Do you wish to enable rate limiting of network commands? (限速不?可以n)

Would you like to choose a different theme? (y/n): (主题)

……….主题直接回车默认吧……….

Enter the username of your webserver (E.g. www-data): root

Enter the user group of your webserver (E.g. www-data): root
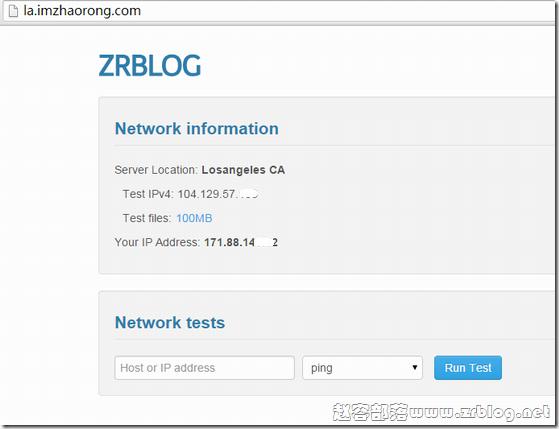
之后很快就完成了,然后访问我们的域名,就能看到如下页面。
本文参考:https://www.moerats.com/archives/633/
本文采用的手动安装方式,上面所列参考地址也包括了纯净系统下的自动脚本安装,大家感兴趣的也可以试试,我不太用debian系统,就不试了。


